Turn on Face ID / Touch ID
You open the wallet with your face or fingerprint instead of the PIN; the PIN always stays as a backup.
Topics in this guide
Before you start
- Face ID, Touch ID or a fingerprint is set up on your phone.
Steps
Step 1: During setup, tap Turn on Face ID / Touch ID
The “Unlock and approve with Face ID” screen comes right after the PIN. The phone asks you to confirm once.
Step 2: To turn it on or off later: Settings → Security
Switch “Face ID / Touch ID on the lock screen” on or off.
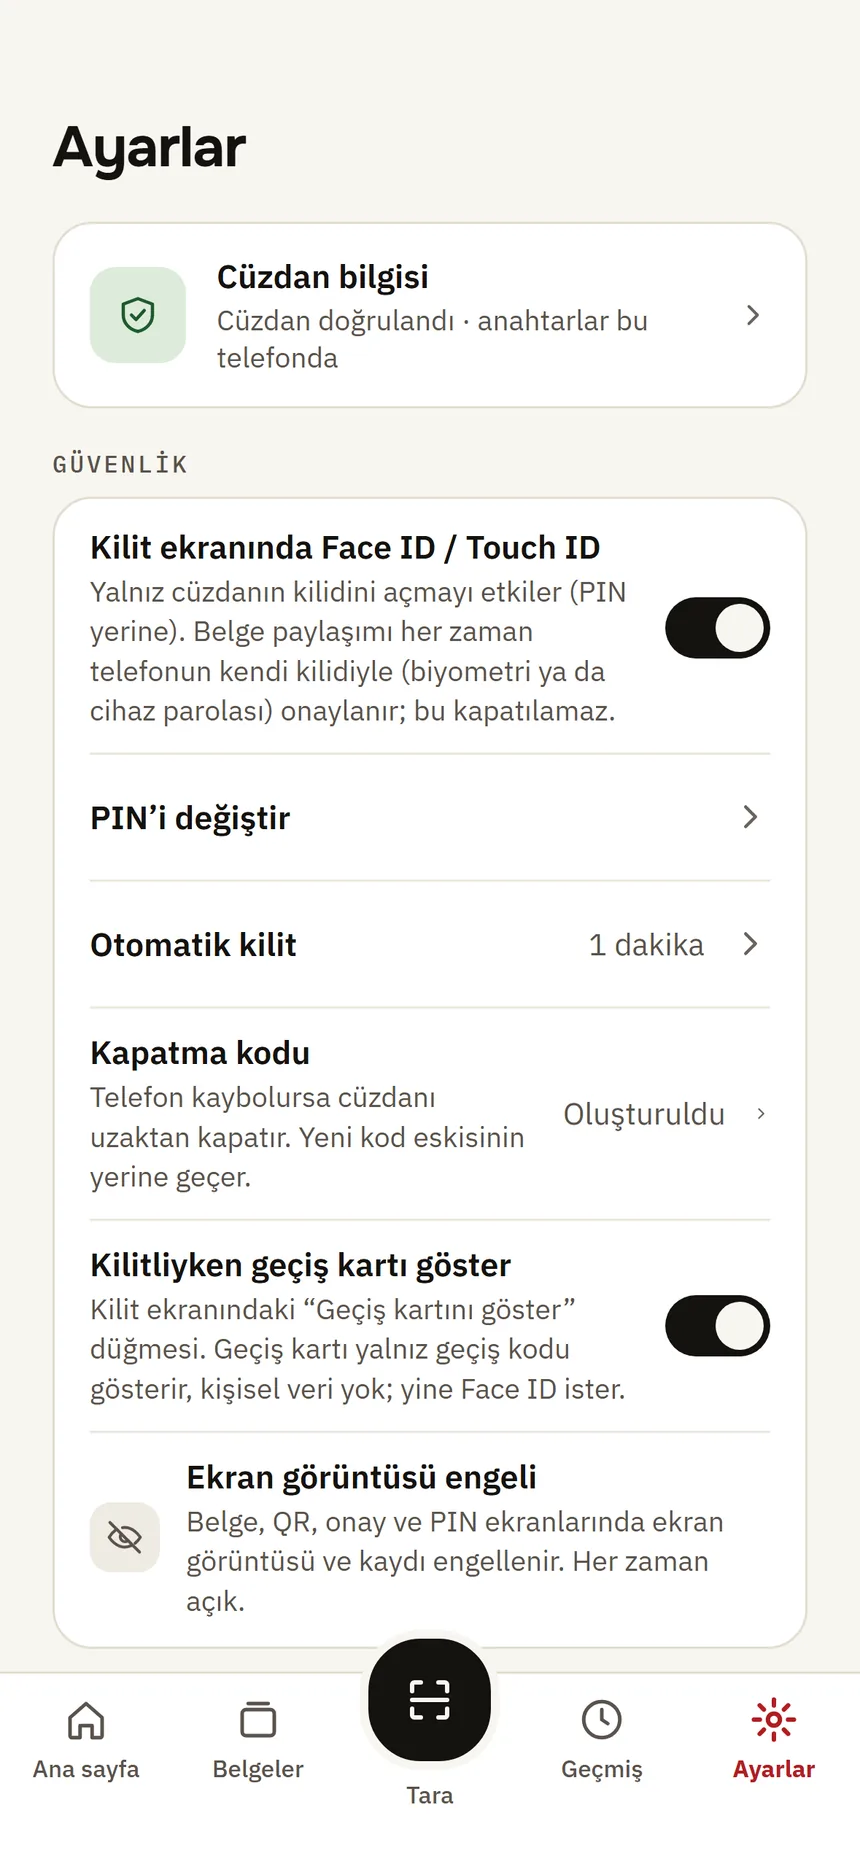
Security settings Step 3: Unlock the wallet
When you open the app, your face or fingerprint is asked automatically. If it does not work, tap the button at the bottom left of the keypad or enter your PIN; the message “Biometrics failed, enter your PIN.” tells you so.
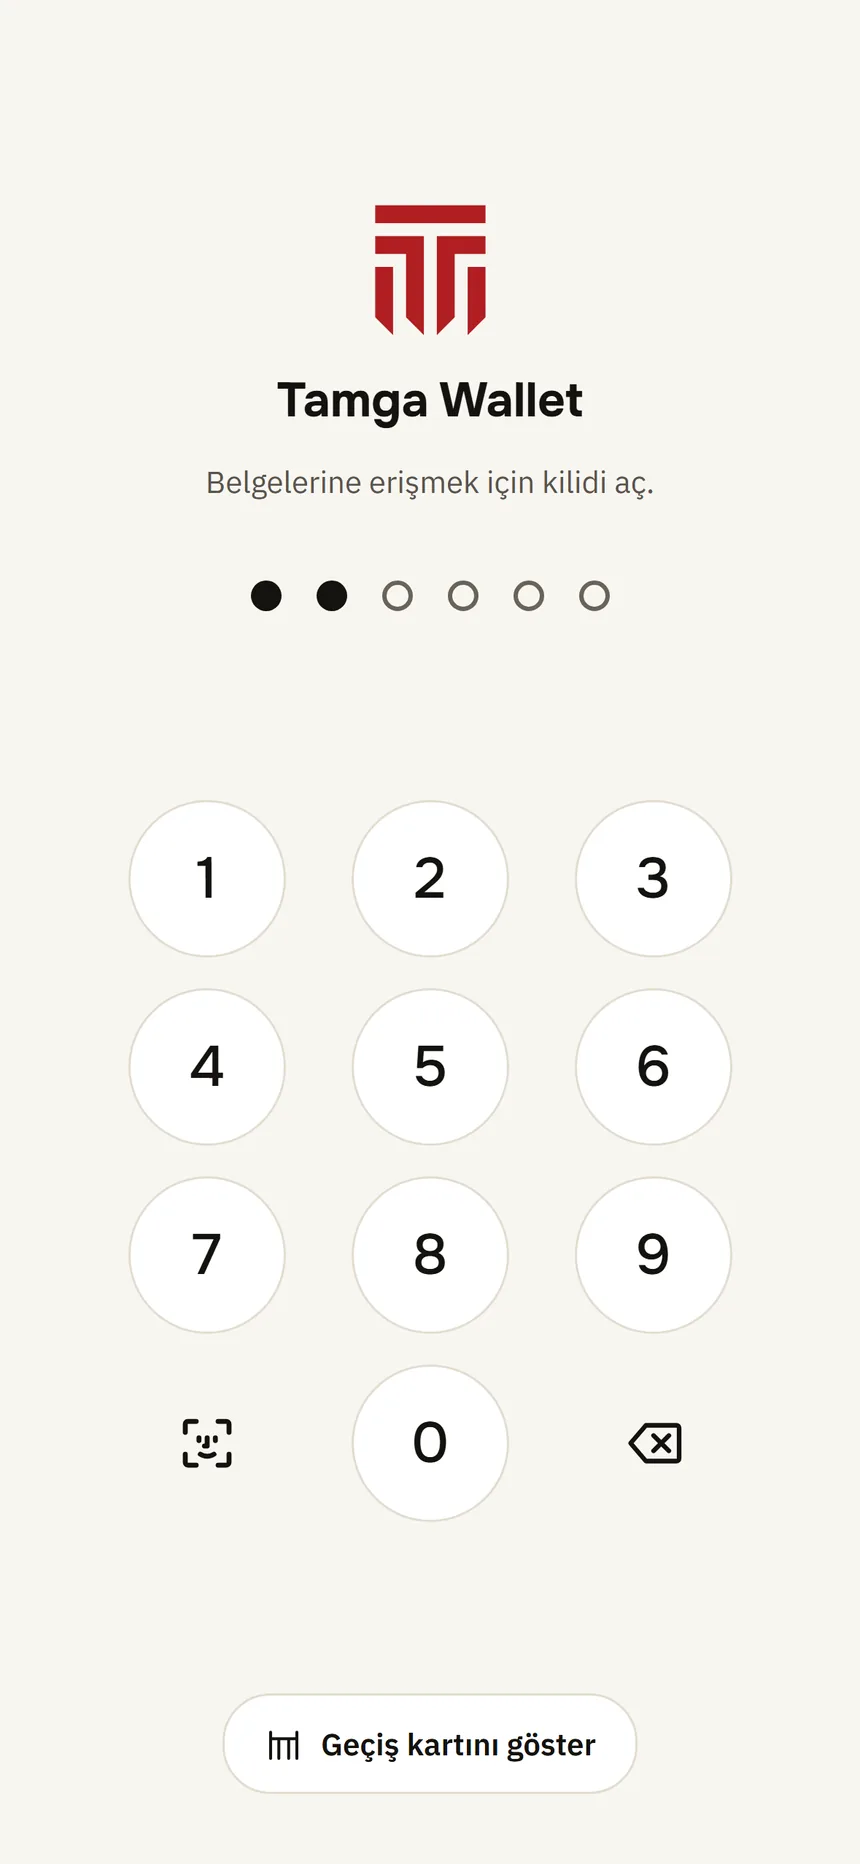
Lock and PIN
Good to know
- Your biometric data stays in the phone's secure area; neither Tamga nor institutions can access it.
- This setting only affects unlocking the wallet. Every presentation is approved with your phone's lock (Face ID / Touch ID or the phone passcode), whatever this setting is; the app's PIN is not used to approve sharing.
- If you change your phone's screen lock or the faces / fingerprints registered on it, some credentials' keys may stop working. The app tells you; you then get those credentials again from the institution.
Related guides
- Set up your walletOn first launch a five-step setup greets you: PIN, Face ID / Touch ID, revocation code, identity verification and your first credential.
- Auto-lockYou choose how long the wallet stays open after you leave the app.
- I forgot my PINTamga does not know your PIN and cannot recover it; the app has no “Forgot PIN” option. If Face ID / Touch ID is on, you open the wallet with it; if not, you set the wallet up again.