“Sign in with Tamga” and a pseudonym per site
When you choose “Sign in with Tamga” on a website, the wallet uses a pseudonym only for that site; your ID number is not shared and sites cannot link you.
Topics in this guide
Before you start
- Your identity credential: pseudonyms are created from it.
- The website must be registered in the Tamga trusted list.
Steps
Step 1: On the website, choose Sign in with Tamga
Scan the QR code with Scan.
Step 2: Read the “Your pseudonym for this site” card
The first time it says “A new pseudonym only for this site will be created.”; if you signed in before, the site recognises you with the same pseudonym.
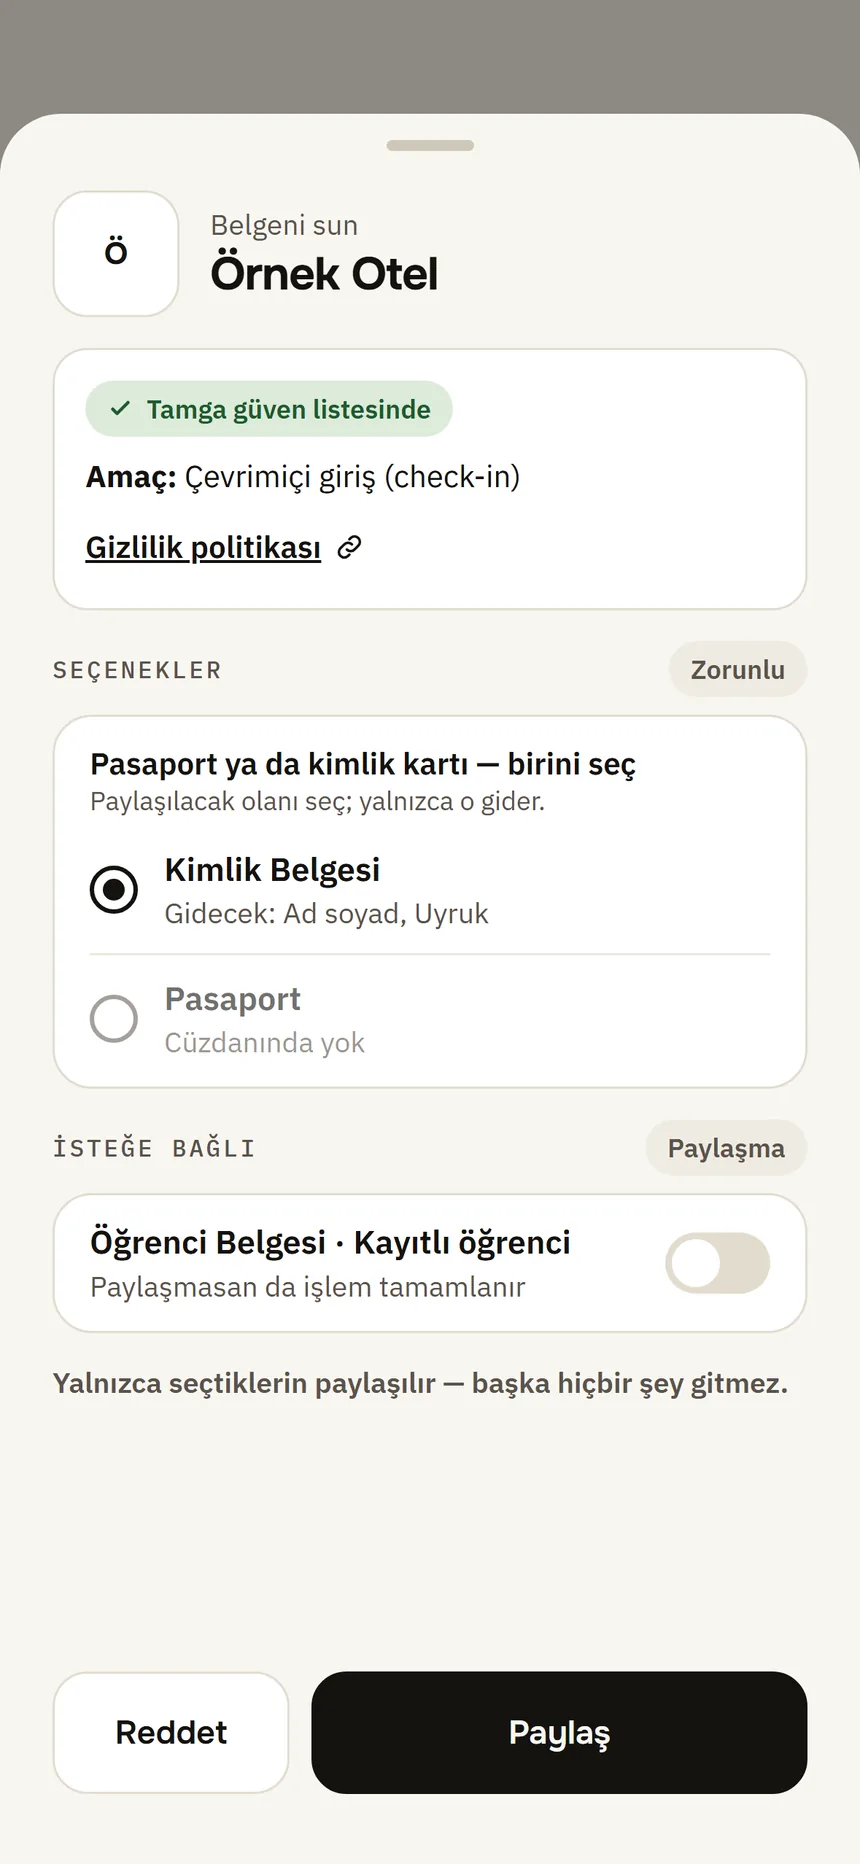
Share approval Step 3: If the site asks for more, check the fields
For example given name and family name to sign up. These fields appear separately in the approval list.
Step 4: Tap Share and confirm
With your phone's lock: Face ID / Touch ID or the phone passcode.
Step 5: See your pseudonyms
Settings → My pseudonyms: Manage your pseudonyms.
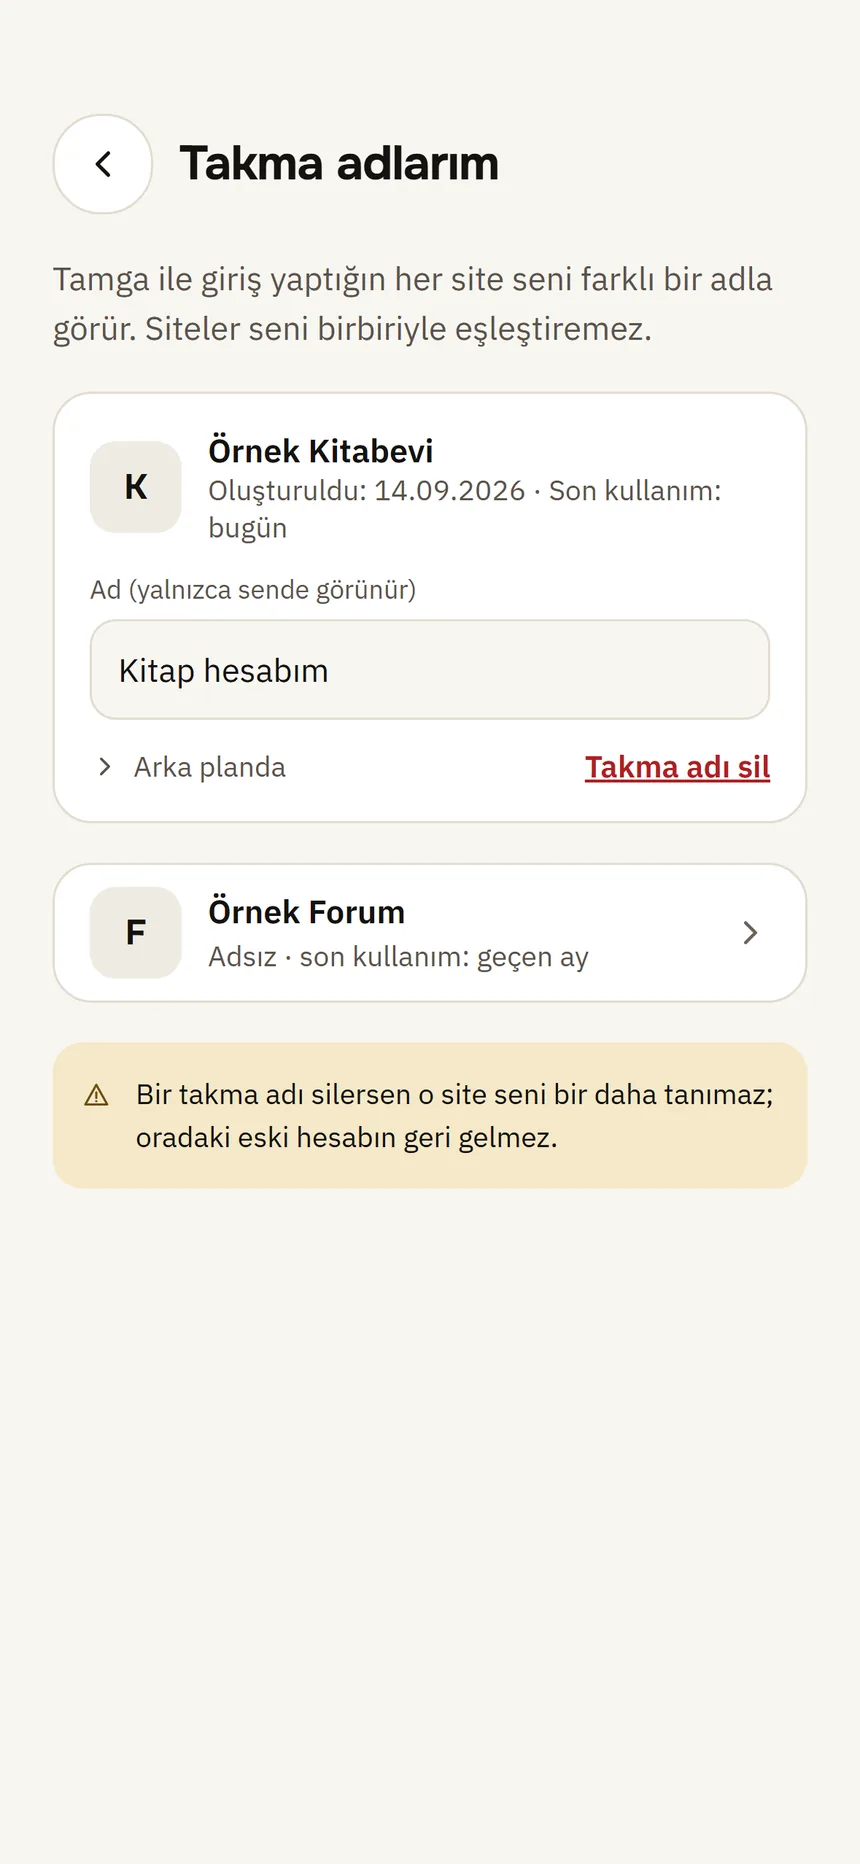
Pseudonyms
Good to know
- Other sites get a different pseudonym, so sites cannot match you. Your ID number is not shared.
- A website that is not in the trusted list cannot get a pseudonym.
- If the app says “Verify your identity again first”: your pseudonyms are created from your identity credential. Verify your identity, then try again.
- On a new phone, verifying your identity again brings your pseudonyms back; your accounts on websites are not lost.